¶ Order and launch a VPS
This guide takes you from placing an order to a finished, running server. The whole thing takes a few minutes — most of which is waiting for the server to build itself.
¶ 1. Start with the order (no account needed first)
There is no separate registration before you buy. On the service page click "Launch a server", or, if you already have the panel, "Order another server". In the form you give your e-mail address and billing details and pay, and you only set your portal password after the payment (step 7). The account is created at the moment you order.
💡 Already have a WebDisk account (from WebDisk Files, say) and using the same e-mail address? The panel will spot that and link the order to your account — you will sign in with your existing WebDisk password. If you would rather be certain, sign in before ordering: the company and e-mail are then already fixed, and the server is attached to the account you have.
¶ 2. Choose the currency and the operating system
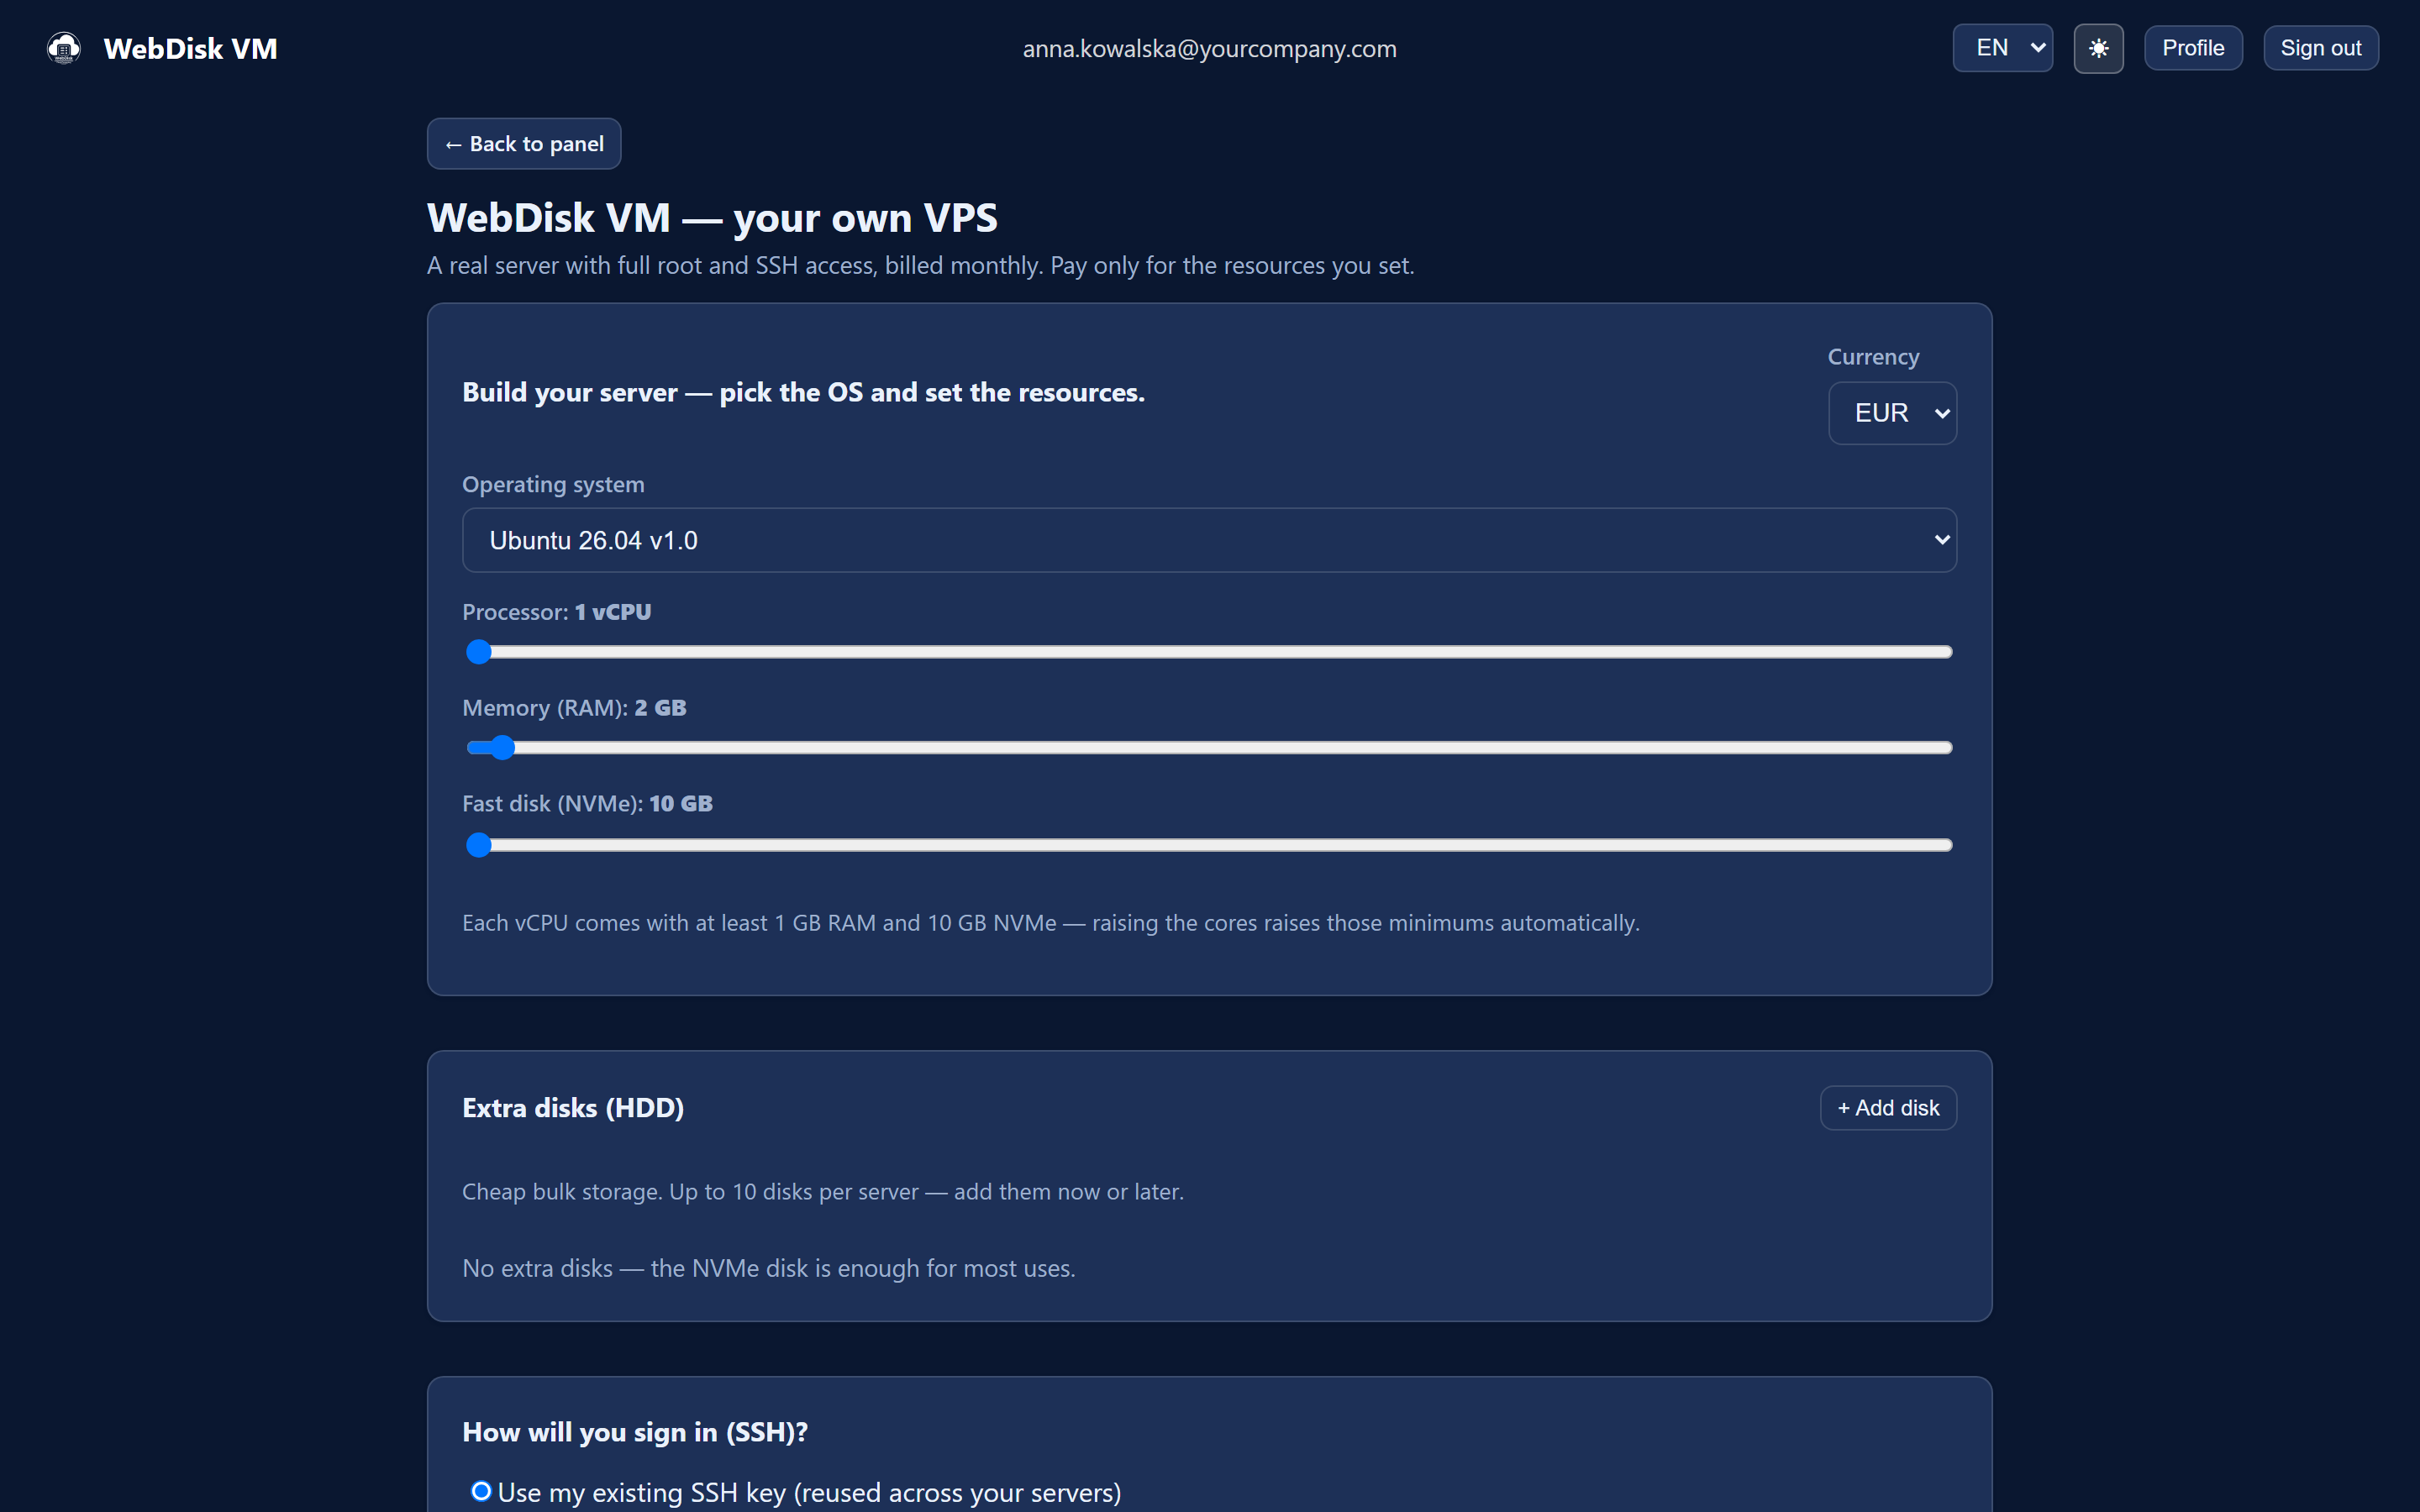
At the top of the form you pick the "Currency" you will be billed in and the "Operating system" (Ubuntu, Debian and so on). The operating system is your server's engine — if you are not sure what to pick, Ubuntu is a popular and friendly choice.
¶ 3. Set the resources with the sliders
Now you decide how much power the server should have. Move the sliders and the price recalculates live.
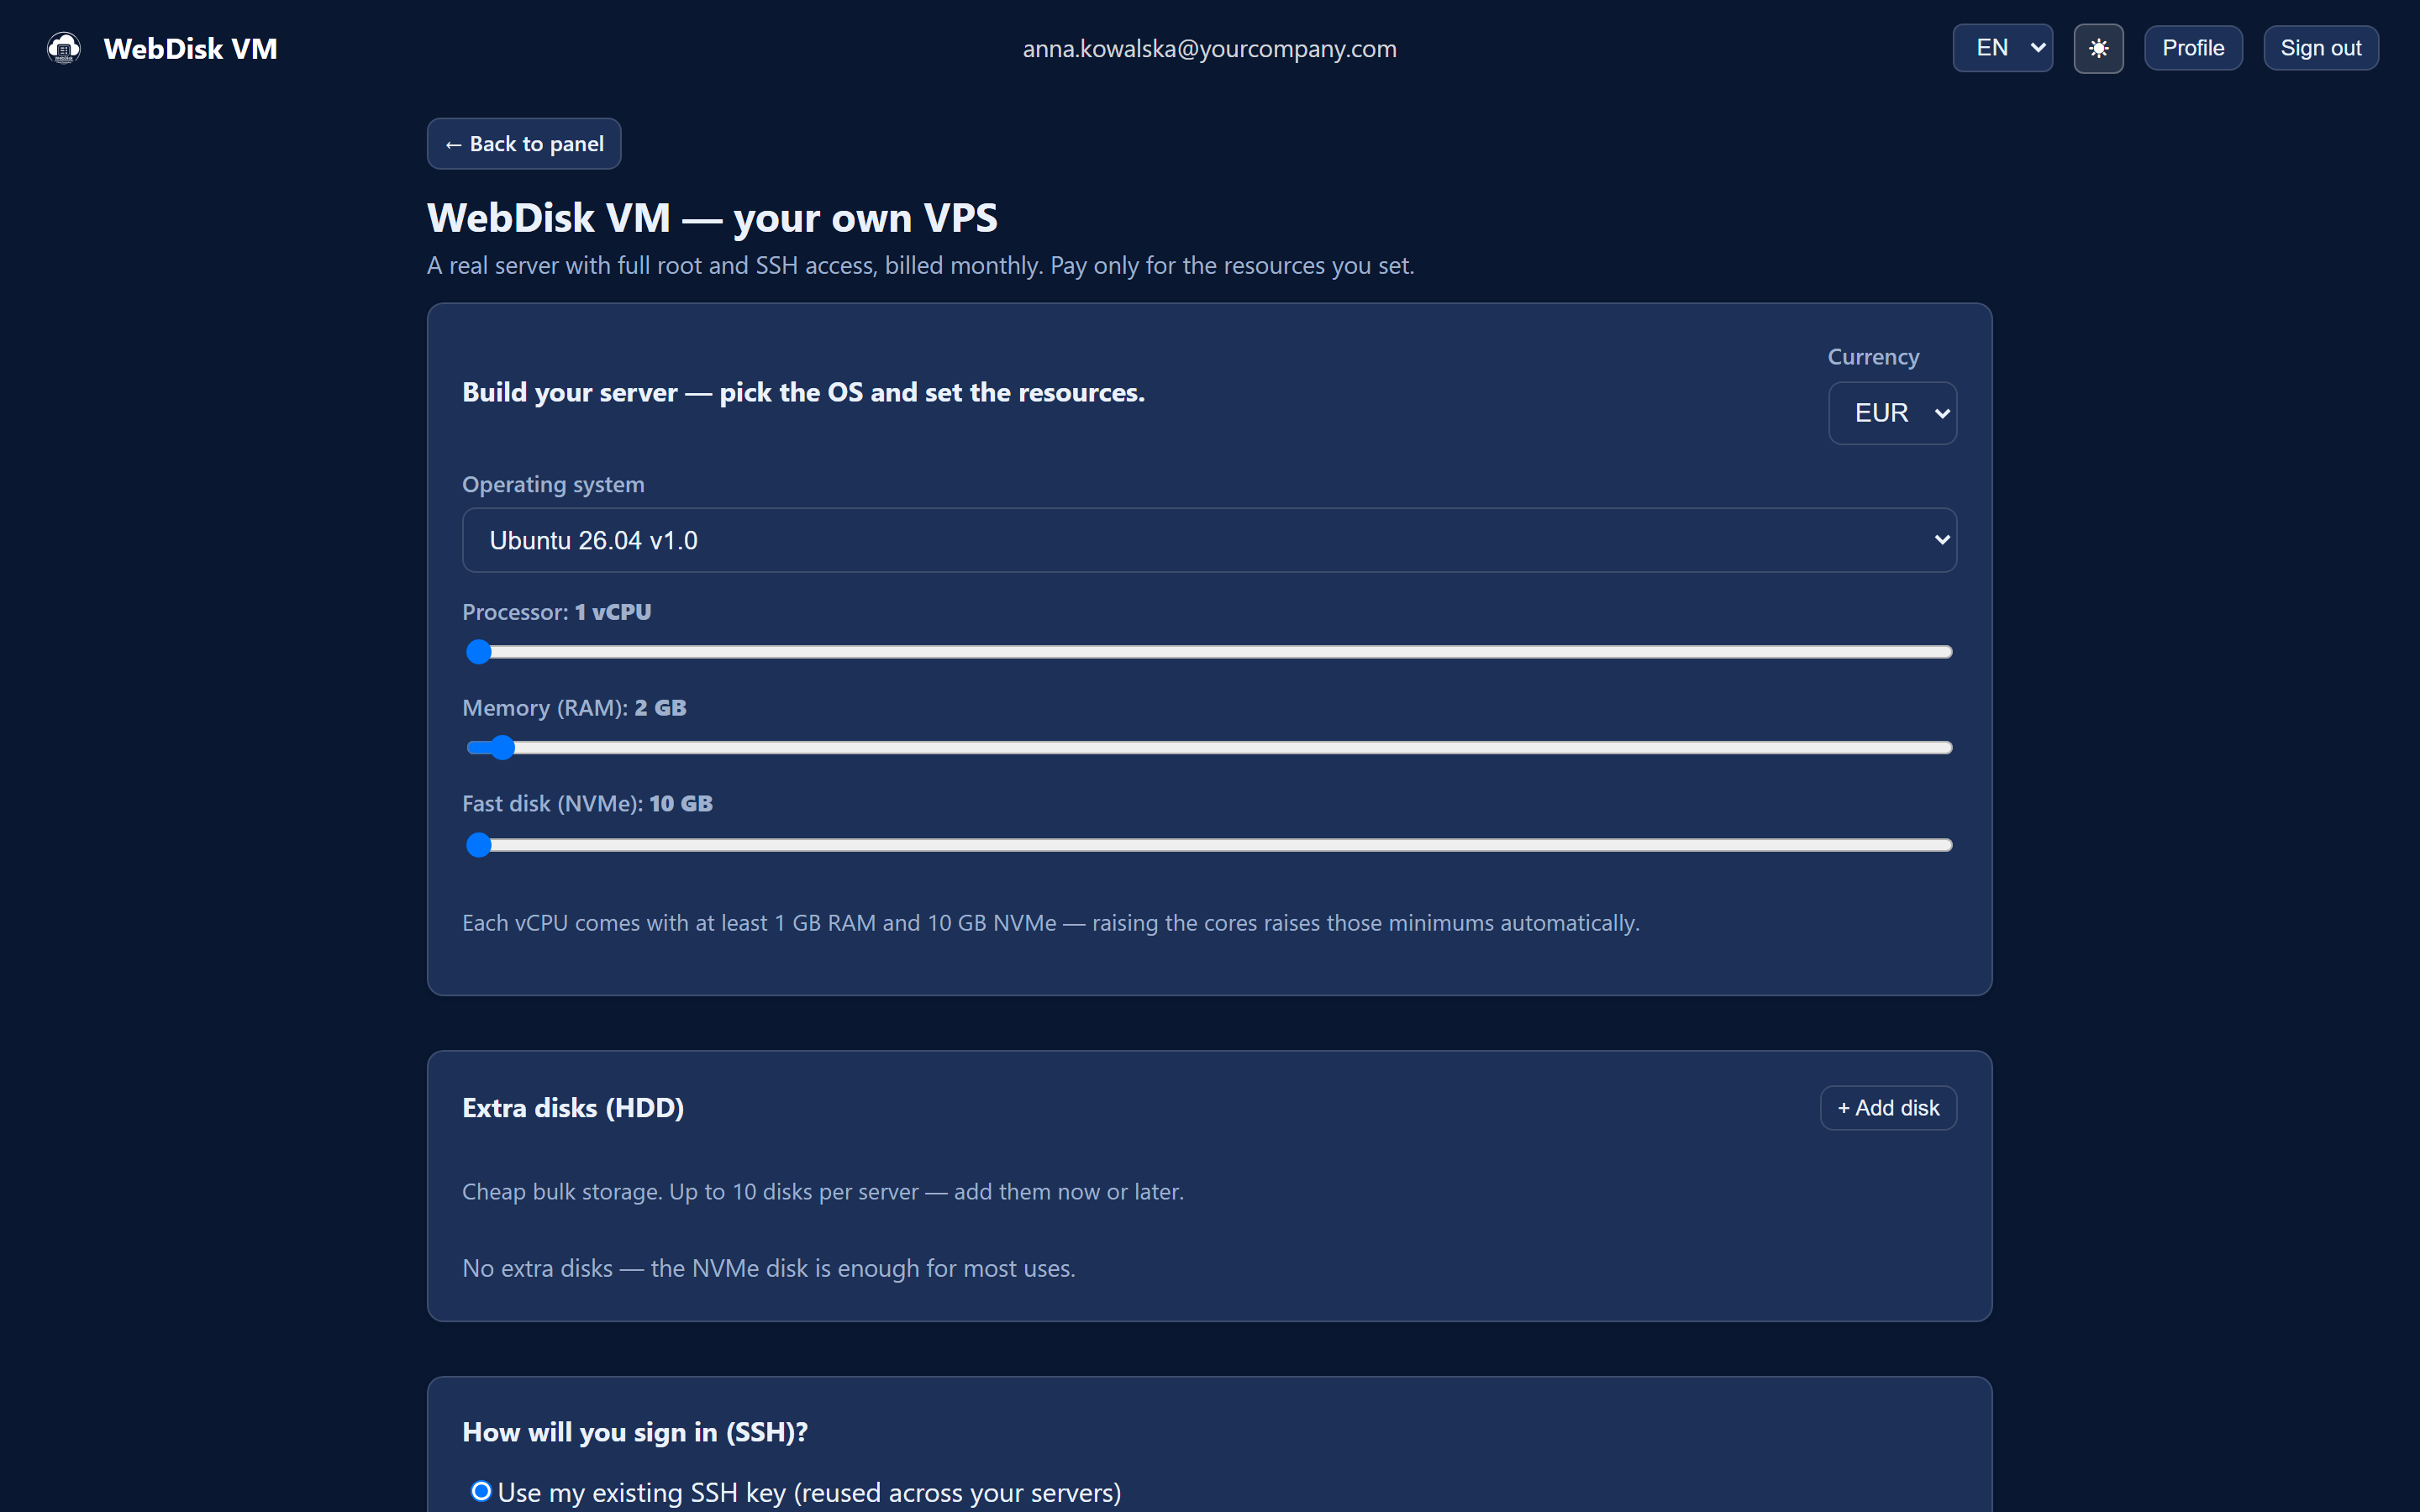
| Setting | What it means |
|---|---|
| Processor | The number of processor cores (vCPU) — the more there are, the faster the server computes. |
| Memory (RAM) | How many programs can run at once. |
| Fast disk (NVMe) | The system disk — the operating system and your files live on it. |
| Extra disks (HDD) | Cheap, roomy storage for data. Add them now or later in the panel. |
So that the server actually works sensibly, the resources are tied together and the panel keeps an eye on it for you: every vCPU comes with at least 1 GB of RAM and 10 GB of NVMe disk. Adding cores raises those minimums automatically.
¶ 4. Choose how you will sign in (SSH key)
You sign in to the server with an SSH key — a safer equivalent of a password (more in the FAQ). The "How will you sign in (SSH)?" section gives you three options:
- "Use my existing SSH key (reused across your servers)" — shown when you already have a key on your account. The same key goes onto the new server, so you sign in with what you already have. No new key is generated.
- "Generate a key for me (download it later in the panel)" — we create a secure key pair and put it on the server. You download the private key after the purchase from the "SSH key" section in the panel.
- "I'll paste my own public key" — if you have your own key, paste its public half (the
.pubfile). The panel checks that the format is valid.
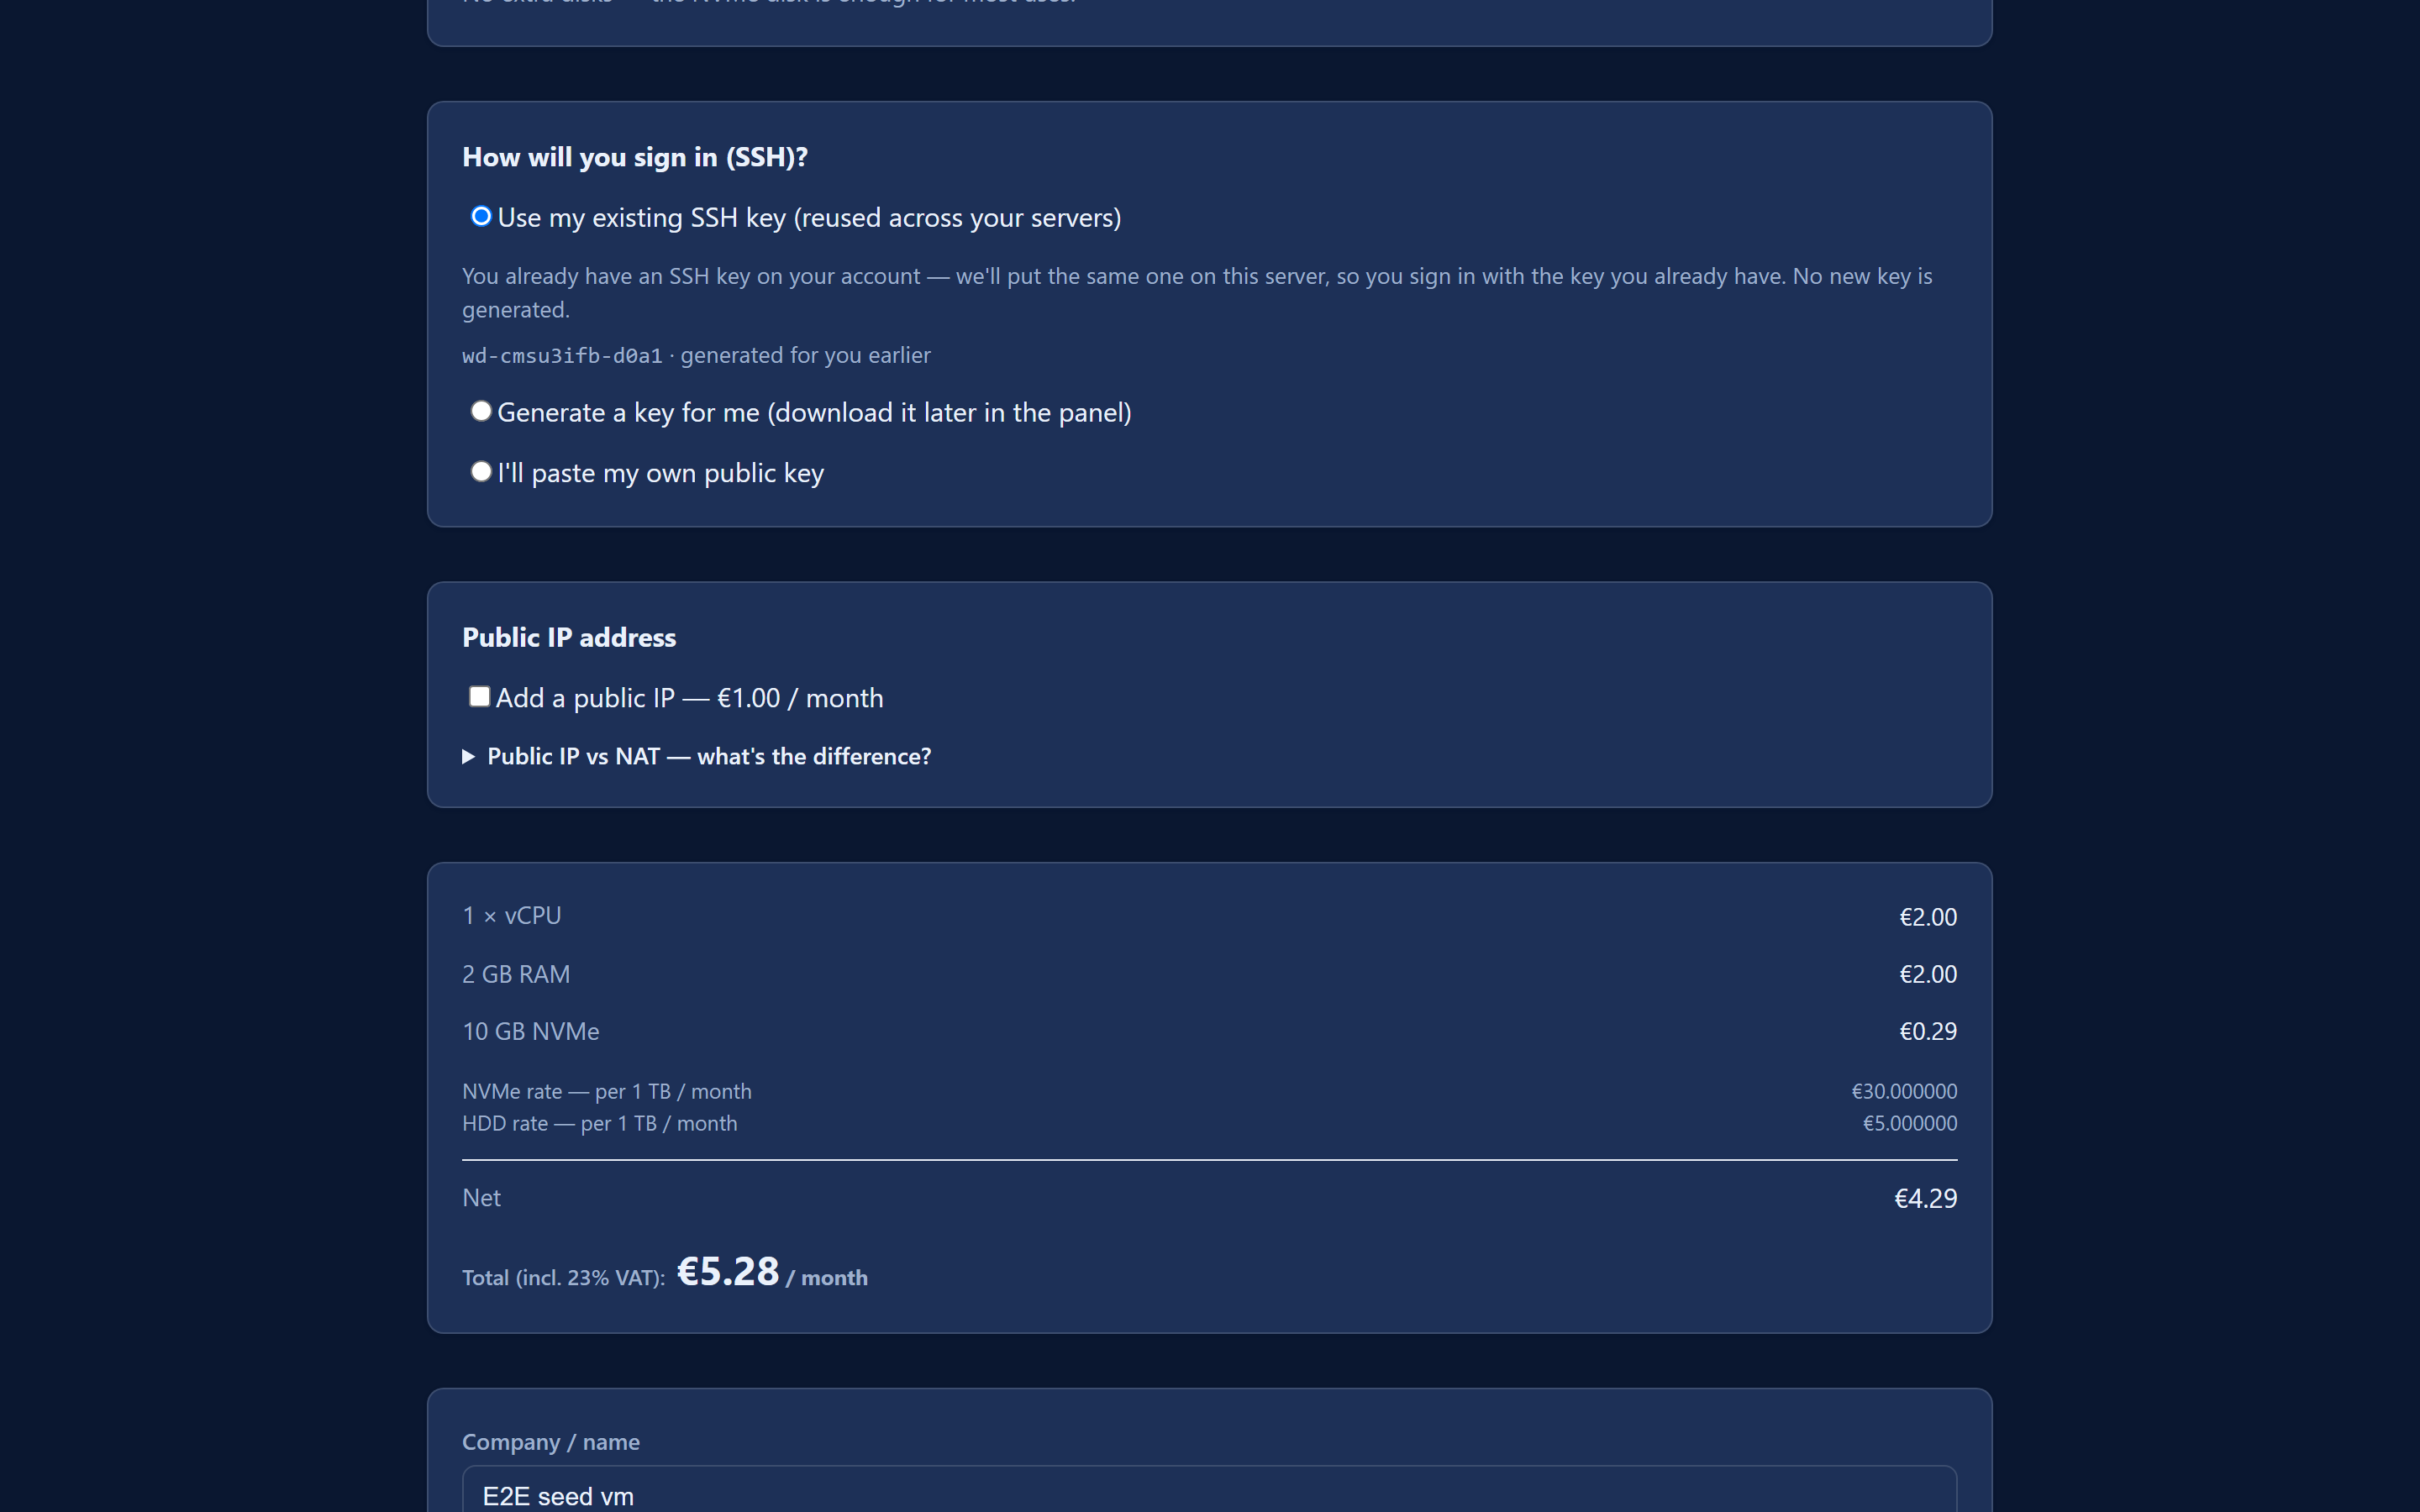
⚠️ Never paste a private key here — that is the one that opens the door to your server, and it stays with you alone. The panel warns you if it spots a private key where the public one belongs.
¶ 5. Public IP address
Your first server gets a public IP address included — reachable from the internet over SSH and the web. For further servers you can either buy a dedicated address for a monthly fee or leave the server without one. The expandable explanation "Public IP vs NAT — what's the difference?" sits in the same part of the form (see the screenshot above).
A server without its own address reaches the internet through a shared address, and the ports you open in the "Firewall" section are forwarded to that shared address — so your service works and is reachable from outside. The difference is that the address is not yours alone and you cannot set a PTR record on it, which mail servers, for instance, require.
¶ 6. Enter your billing details, accept the documents and pay
At the bottom of the form you fill in the buyer's details (name/company, country, e-mail), accept the Terms of Service and the Privacy Policy, check the net and gross amounts — and click "Continue to payment". Billing is monthly, with no long commitment.
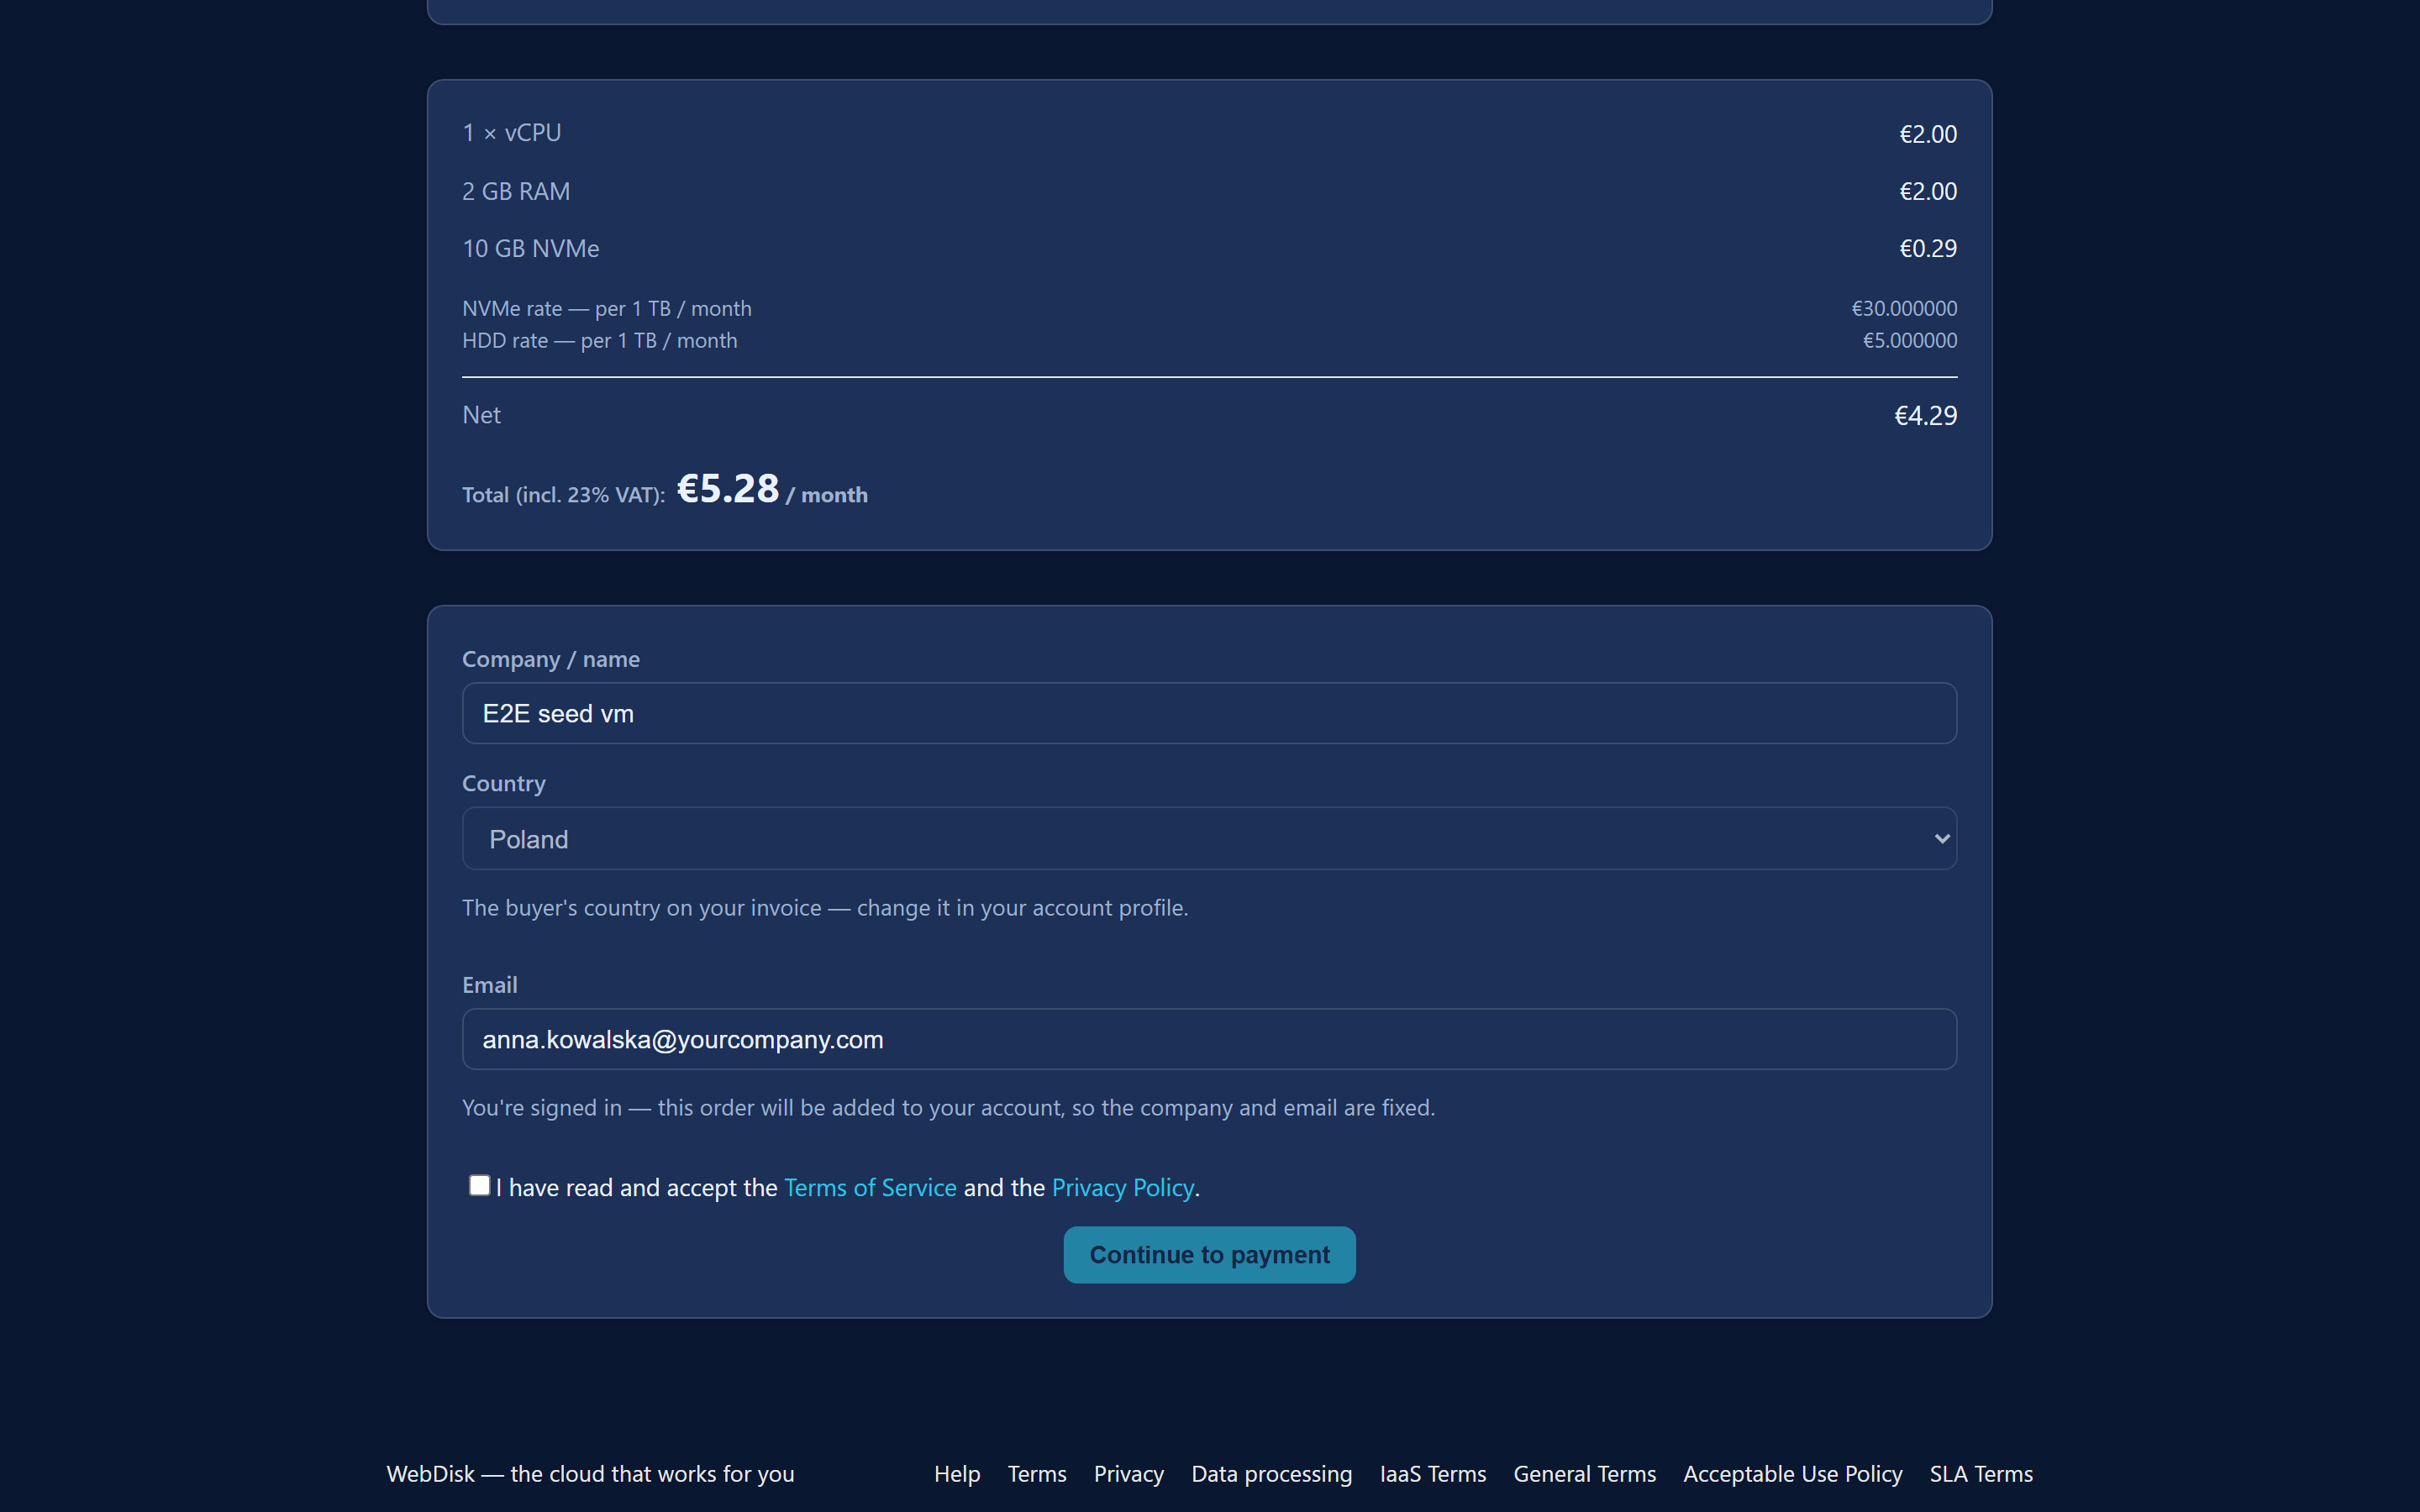
💡 The order summary breaks the price down into processor, memory, disks and public IP. VAT invoices are issued to companies and require a completed profile — see the FAQ.
¶ 7. Set your portal password and sign in
Once you have paid you will see a confirmation with a "Set your portal password" button, and the same link arrives by e-mail. You set a password and from then on sign in to the panel with your e-mail address.
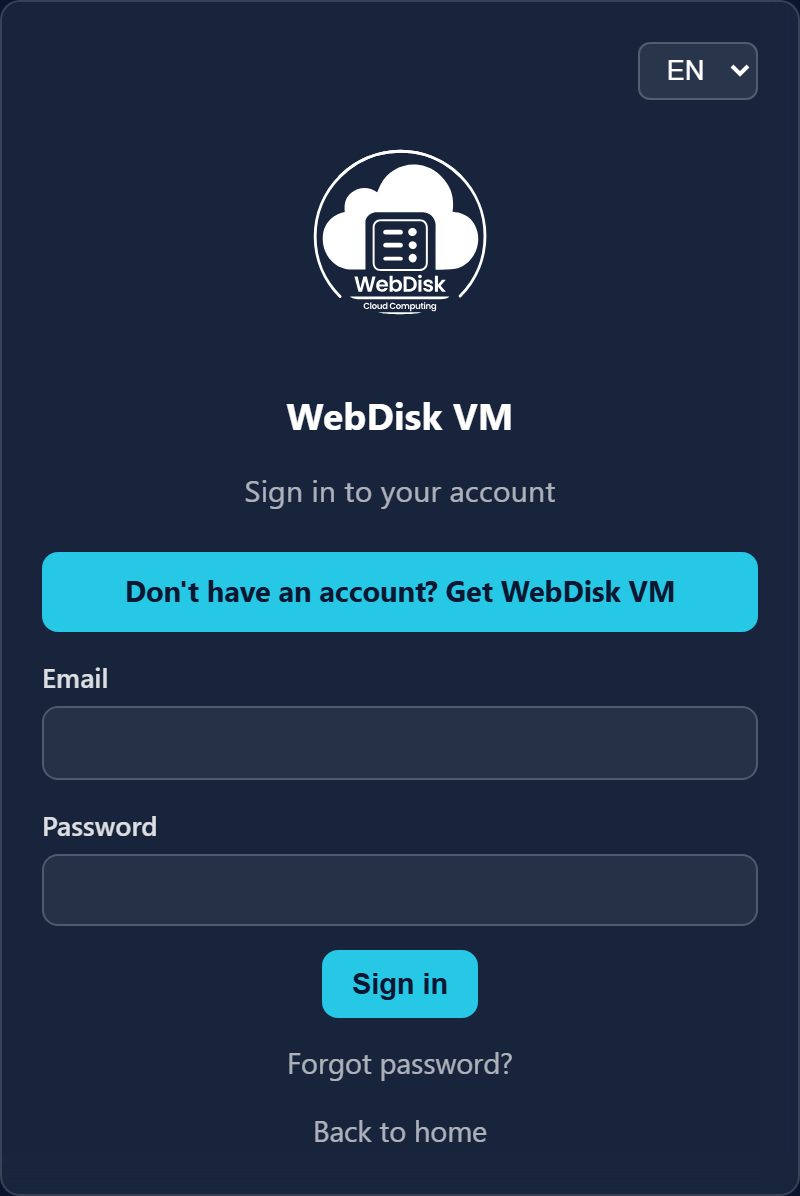
💡 If we linked the order to an earlier WebDisk account of yours, you sign in with the password you already have — there is no new one to set.
¶ 8. Confirm your e-mail address
The activation e-mail contains a link that confirms your address. Do it within 7 days. Until you do, the panel reminds you with a banner at the top of the page.
⚠️ Without confirmation, after 7 days the account is suspended: all your servers are stopped and actions in the panel are blocked. All it takes is clicking the activation link in the most recent e-mail. Contacting us through "Report a problem" works even then.
¶ 9. The server builds itself
After payment there is nothing for you to do — the server is created automatically. On its card you will see the statuses "Queued", then "Provisioning", and finally "Running". It usually takes a few minutes; once the server is ready we e-mail you the connection details.
¶ 10. Where to find the address and access details
Open your server's card in the panel. On it you will find:
- "Public IP" — the address you connect to.
- "DNS name" — the name assigned to the server; you can use it instead of the IP address.
- "Internal IP" — the address on your private network, on which your servers see each other.
- In the "Access" section, the "Show login" button — the user and password, as a fallback for when the key is not to hand.
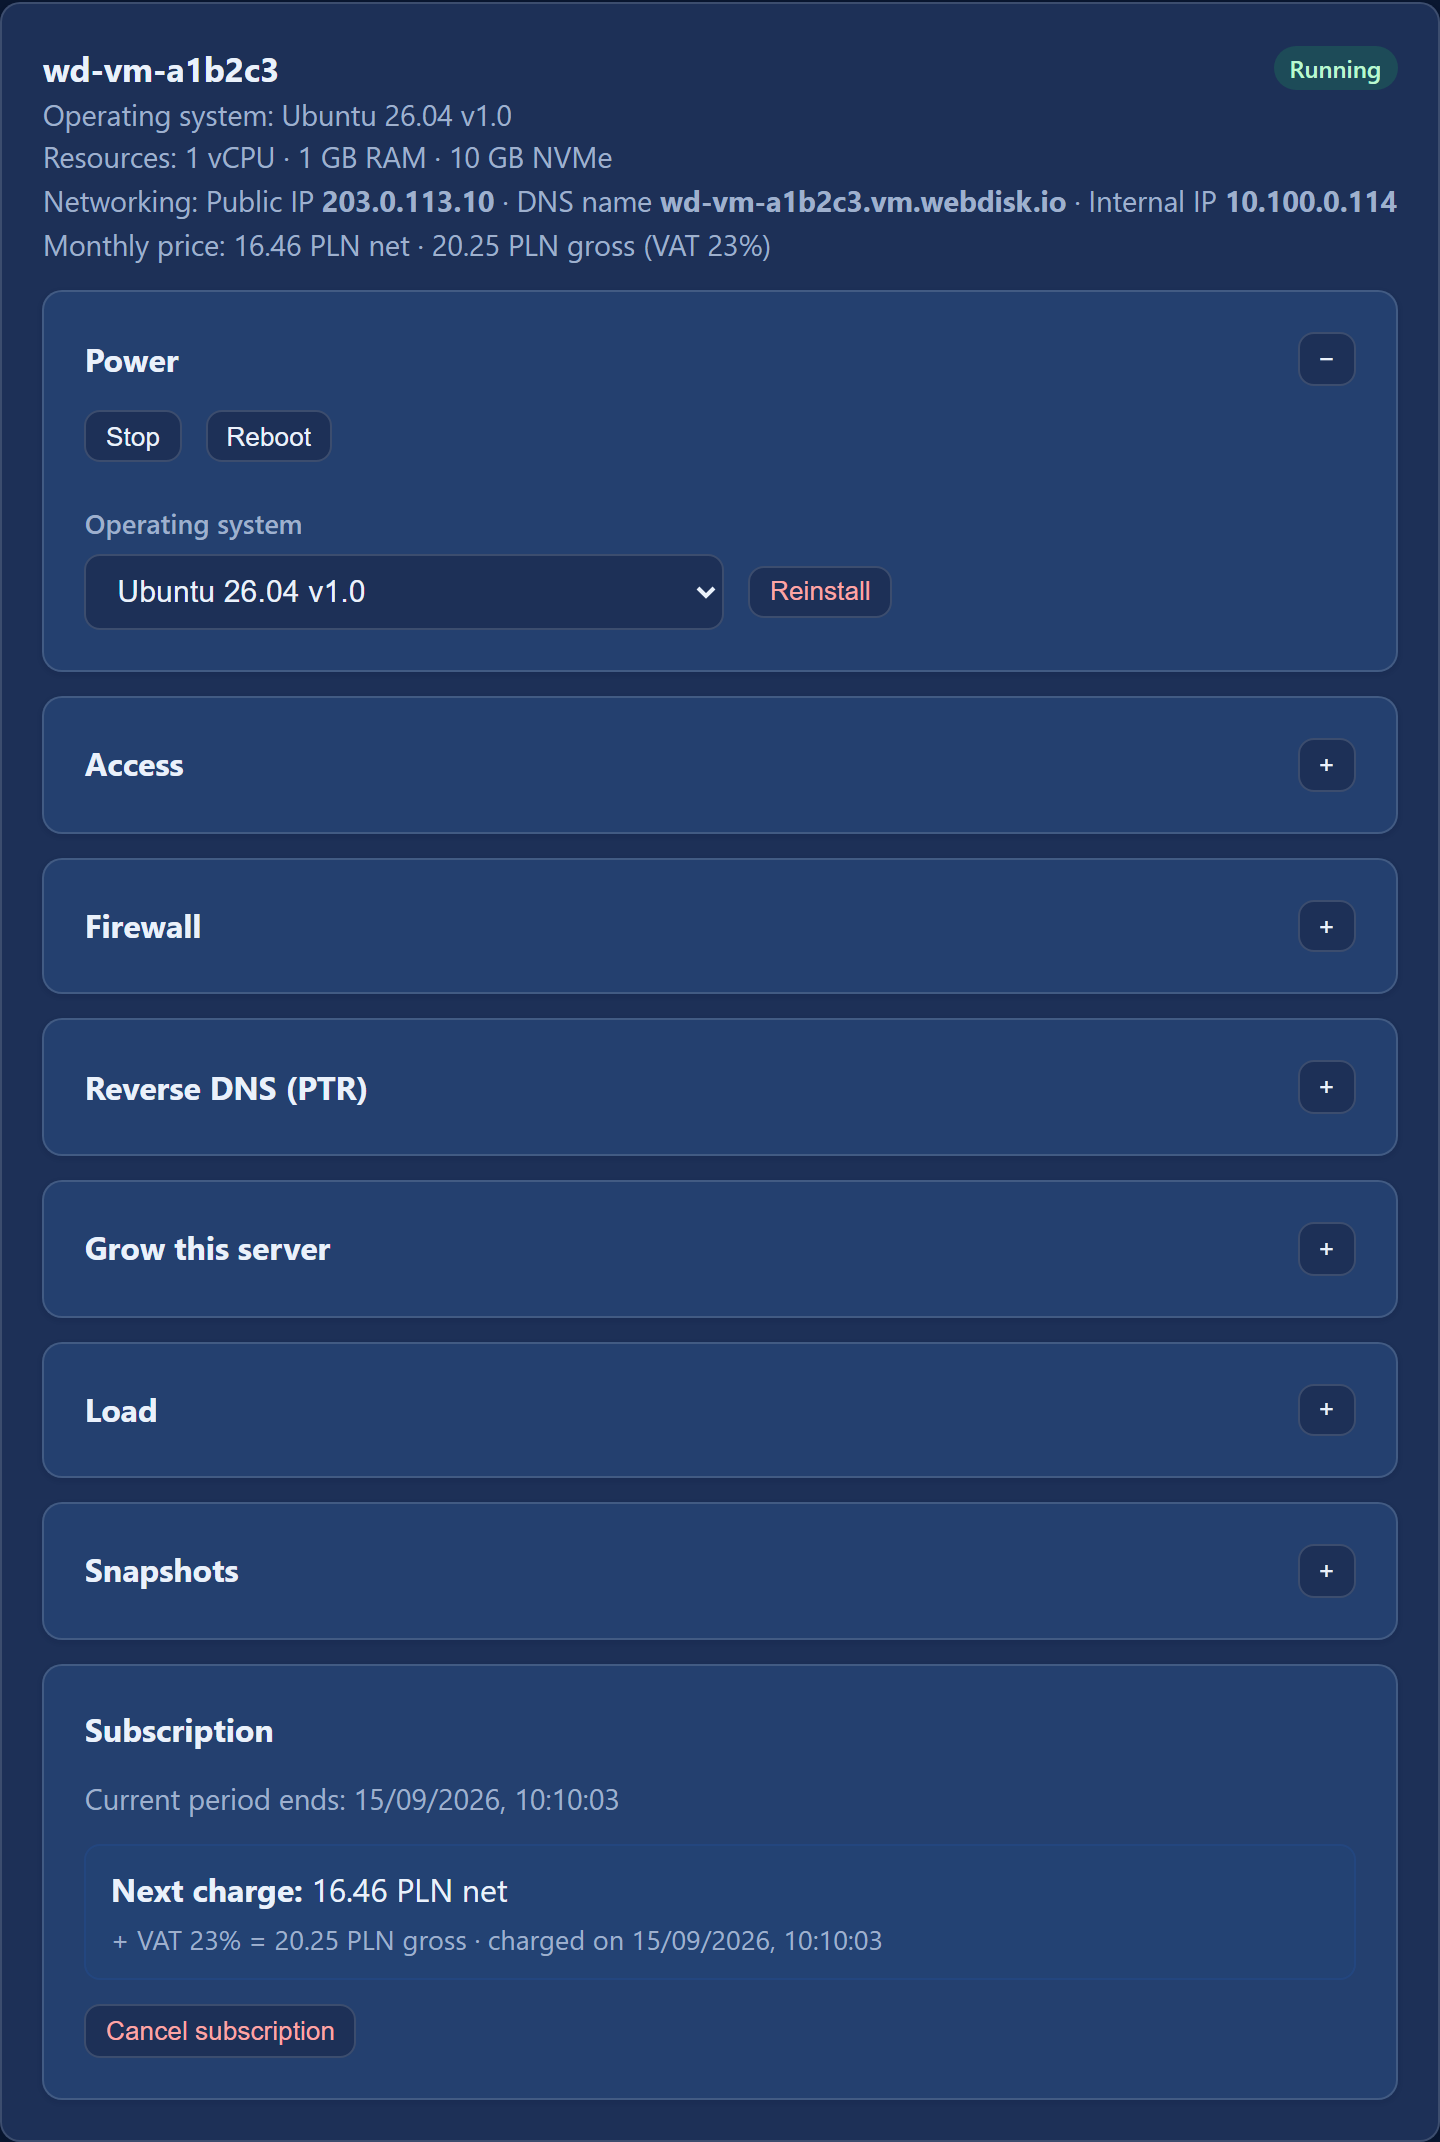
⚠️ The private key is not on the server card. You download it from the "SSH key" section, which sits below the list of servers, at the foot of the panel, because there is a single key for the whole account. Details: Access and management.
¶ What next?
- Want to connect to the server or change its settings? → Access and management
- Got a question about keys, backups, invoices or deadlines? → FAQ